Products are a collection of one or more tracks. For example, a 10 track Album, 3 track EP or 1 track Single. Once you’ve created a project, follow these steps to create a product. (Pro tip: be sure to follow our Guide to Timelines).
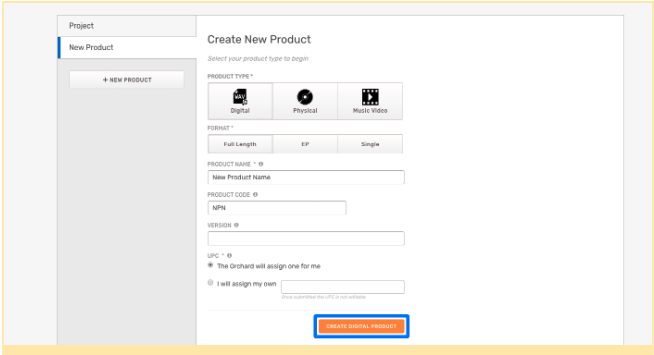
- Click + New Product.
- Select the Product Type.
- Input your product metadata and click Create Digital Product.
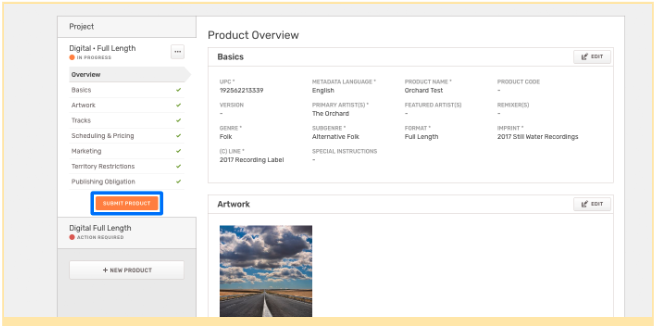
Product Overview
Once you create a product, you’ll be taken to the Product Overview. Here, you’ll see a snapshot of the progress you’ve made in the creation process.
- To begin editing product metadata, click Edit Basics.
- To add or edit artwork, click Edit Artwork.
- To add or edit tracks, click Edit Tracks.
- To add or edit territory restrictions, click Edit Territory Restrictions.
Product Workflow
As you work through the creation process, keep track of your progress using the product
navigation. To edit your product, choose from any of the sections. We recommend starting
with the information you currently have available.
Complete Product Basics
To edit product basics, the key identifying details of your product, follow these steps:
- Select Basics in the product navigation.
- Input the product metadata you’re ready to complete.
- Click Save to save your changes and proceed to the next section.

Upload Artwork
To upload artwork, follow these steps:
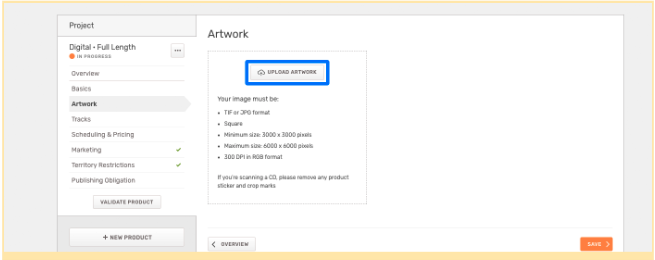
- Select Artwork from the product navigation.
- Drag and drop your artwork or click Upload Artwork to choose your file.
- Click Save to save your changes and proceed to the next section.
Note: Due to an update in processing, your image might take a bit longer to load. Nevertheless, this will help to avoid issues in the approval process.
Add Tracks
To manage your tracklist and enter track details, follow these steps:
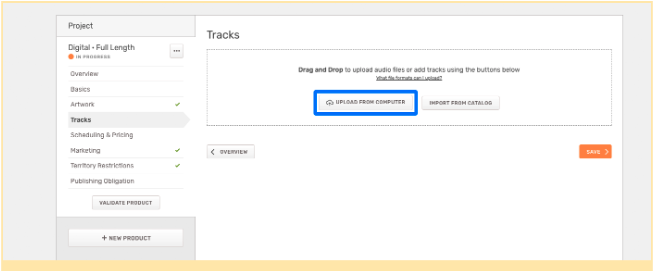
- Select Tracks from the product navigation.
- To add new tracks, drag and drop files or click Upload From Computer to choose your files.
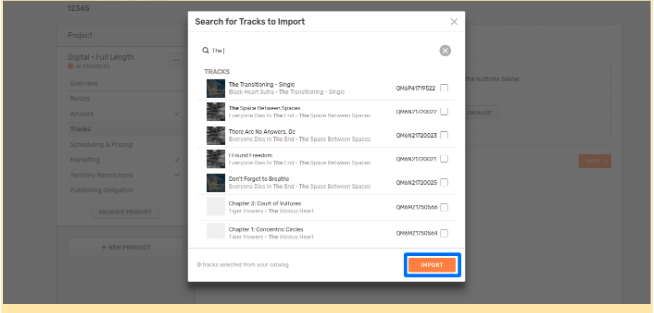
- To import tracks from your catalog, click Import From Catalog. Search your catalog, select the tracks you’d like to add, and click Import.
- To create blank tracks, click Blank Tracks to choose how many blank tracks you’d like.
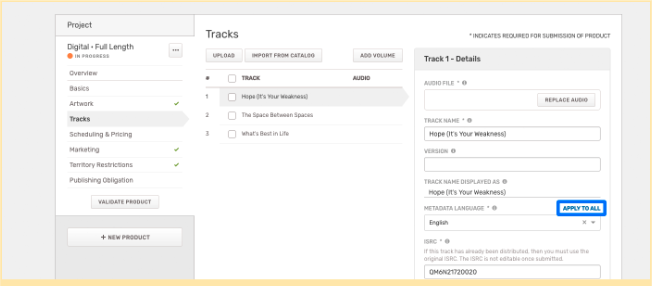
Add Track Details
Once you’ve added tracks, follow these steps to add track details:
- Select any track to display its track details.
- Input all pertinent track metadata.
- To apply a specific piece of metadata (i.e. Metadata Language) to all tracks, click Apply To All on the pertinent field after entering the correct information.
- Click Save to save your changes and proceed to the next section.
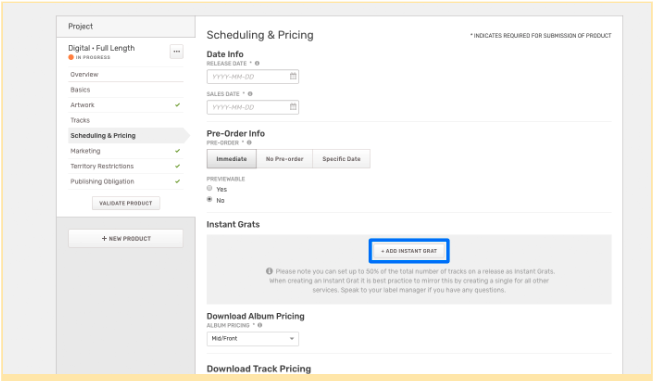
Plan Your Release and Pricing Strategy
To manage scheduling and pricing, follow these steps:
- Select Scheduling & Pricing from the product navigation.
- Input all pertinent information.
- Below, click Add Individual Track Price to set pricing at the track level.
- Click Save to save your changes and proceed to the next section.
Instant Grats
You can create Instant Grat tracks by clicking on + Add Instant Grat.
If you'd like more information please see the Instant Gratification Tracks article.
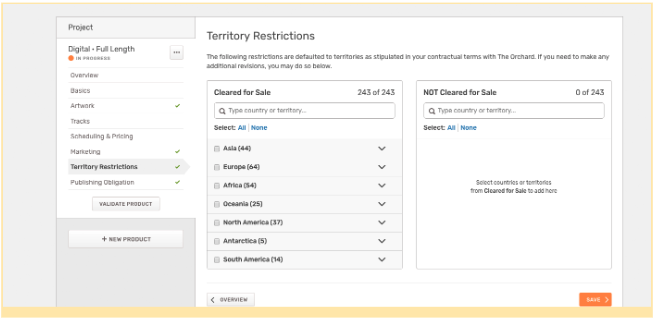
Add Territory Restrictions
To change territory restrictions for a product, follow these steps:
- Select Territory Restrictions from the product navigation.
- Select the continent or individual countries you’d like to change. To select individual countries, click the pertinent continent’s row to expand the list.
- Once you’ve made your selection(s), click Move Selected to Not Cleared for Sale or Move Selected to Cleared for Sale.
- Click Save to save your changes and proceed to the following section.
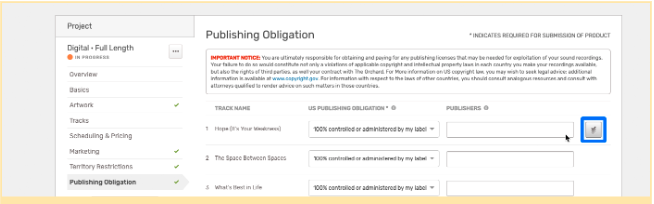
Add Publishing Obligation
To add publishing obligations, follow these steps:
- Select Publishing Obligation in the product navigation.
- Select the appropriate ownership for each track in the US Publishing Obligation column.
- If applicable, enter the Publisher for each track.
- To apply the same publishing information to all tracks, hover over the row you’d like to apply and click the Apply All button.
Validate and Submit Your Release
When you are building a project in Workstation, we provide real-time visual representation of what’s completed and what needs a second look. To determine your progress at any point in your digital product creation workflow, follow these steps:
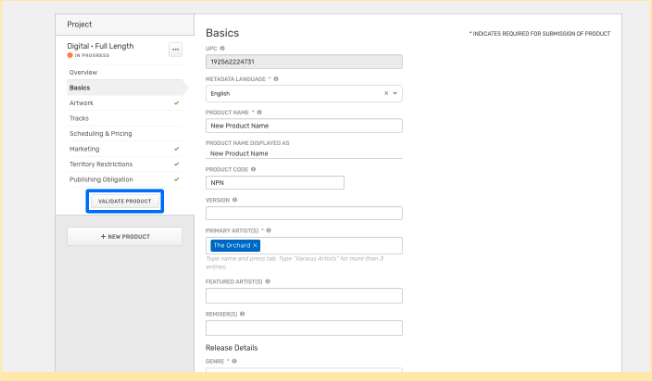
- Click Validate Product in the product navigation. A red warning icon will appear next to sections that did not pass validation. These sections either contain errors or are missing required information. A green checkmark icon will appear next to sections that have passed validation.
- Select any section that did not pass validation from the product navigation.
- Correct all errors highlighted in red.
- Click Save. A green checkmark will appear next to the section in the product navigation if it was completed successfully. Note: You must validate your product before you can submit it. Once all sections have been validated, and all errors have been corrected, the option to submit your product will appear.
- Review all sections for good measure.
- When you’re ready, click Submit Product.
Rejection and Correction Process
Once you’ve submitted your product, the QC team will review it and confirm that the product information you’ve provided meets the formatting required by stores.
Rejected
If the QC team has questions, you’ll receive an email notification that your release has been rejected. Please make any requested changes and resubmit the release for approval.
If you have any questions please reach out through the Support tool in the Workstation.
Approved
If there are no questions regarding your release, then you are good to go and it will be sent for delivery to digital services. You will be able to see where the release has been delivered in the delivery report on the Catalog tab in Workstation.
Edits Post-Delivery (TBD at LAUNCH)
If a product that has already been released to the digital services needs to be changed, such as correcting a spelling mistake or re-uploading the audio file, you can submit your edits in Workstation for approval by the QC team
To do so:
- Navigate to your delivered product via the Catalog page or search bar on the Homepage
- Make edits to any eligible (or editable) field
- Resubmit your product changes for approval. Upon approval, your edits will go live and your product will be updated on the appropriate retailers.
Delivery Report
Once your product has been approved and sent out to the digital services, you can track the delivery status. View the date the product was delivered and, if applicable, the product’s iTunes, Spotify and Deezer URLs.
- Navigate to the Products page in Catalog.
- Filter the product list by Status: Delivered.
- Click truck icon to view delivery report.
